Seriously Simple No Knead Wild Fermented Sourdough Bread
Over a decade ago I got THE BEST birthday present... My sweet friend Eliza (who did all the baking and desserts for both A Tavola and The Huguenot in New Paltz, NY) taught me how to bake a damned good loaf of bread. And not just any loaf, but a wild fermented, completely homemade, no knead, follow-the-recipe-and-you-shall-never-fail rustic sourdough loaf. I’ve been testing and tweaking and baking lord-only-knows how many loaves since, amd decided I had to write it all out for you. I feel I can die an accomplished woman now.
Across many cultures the world over, bread is the sustenance of life. It's even sparked entire revolutions. It's about time we all learned how to bake it!
This recipe harks back to the traditional way of making bread prior to the commercial production of yeast that occurred in the late 19th century. (You couldn't always walk into a supermarket and snag a few packets of Fleischmann's dry active yeast.) Here we will harness the naturally occurring, biodiverse forms of wild yeast that surround us constantly in the air we breathe. It's everywhere, and so anyone can make this bread. All you need is flour, water and salt. It's that simple.
The yeast is what produces the light, fluffy crumb with those delicious holes butter loves to melt down into. It makes the dough rise by transforming carbohydrates into bubbles of carbon dioxide and alcohol (the latter of which is cooked off when the bread is baked).
Wild fermented sourdough bread is much healthier and easier to assimilate than most other breads. As fermentation guru Sandor Katz says in his book Wild Fermentation: The Flavor, Nutrition & Craft of Live-Culture Foods, "Wild fermentation gives the dough a chance to really ferment, breaking down hard-to-digest gluten into more easily absorbed nutrients, and adding B-vitamins." I feel my body digests it very easily, where as most commercial breads weigh me down big time. Real talk- I have gluten-intolerant friends who can eat half a loaf of my sourdough without any issues. It’s magical bread.
I have seen many a recipe that requires fussing over your starter like it’s a child and making a leaven that better pass the float test or else, and hours of attention with 30 minute intervals of stretching and turning and bench rests and… who’s got time for all that?! I certainly don’t. That’s why I love this method.
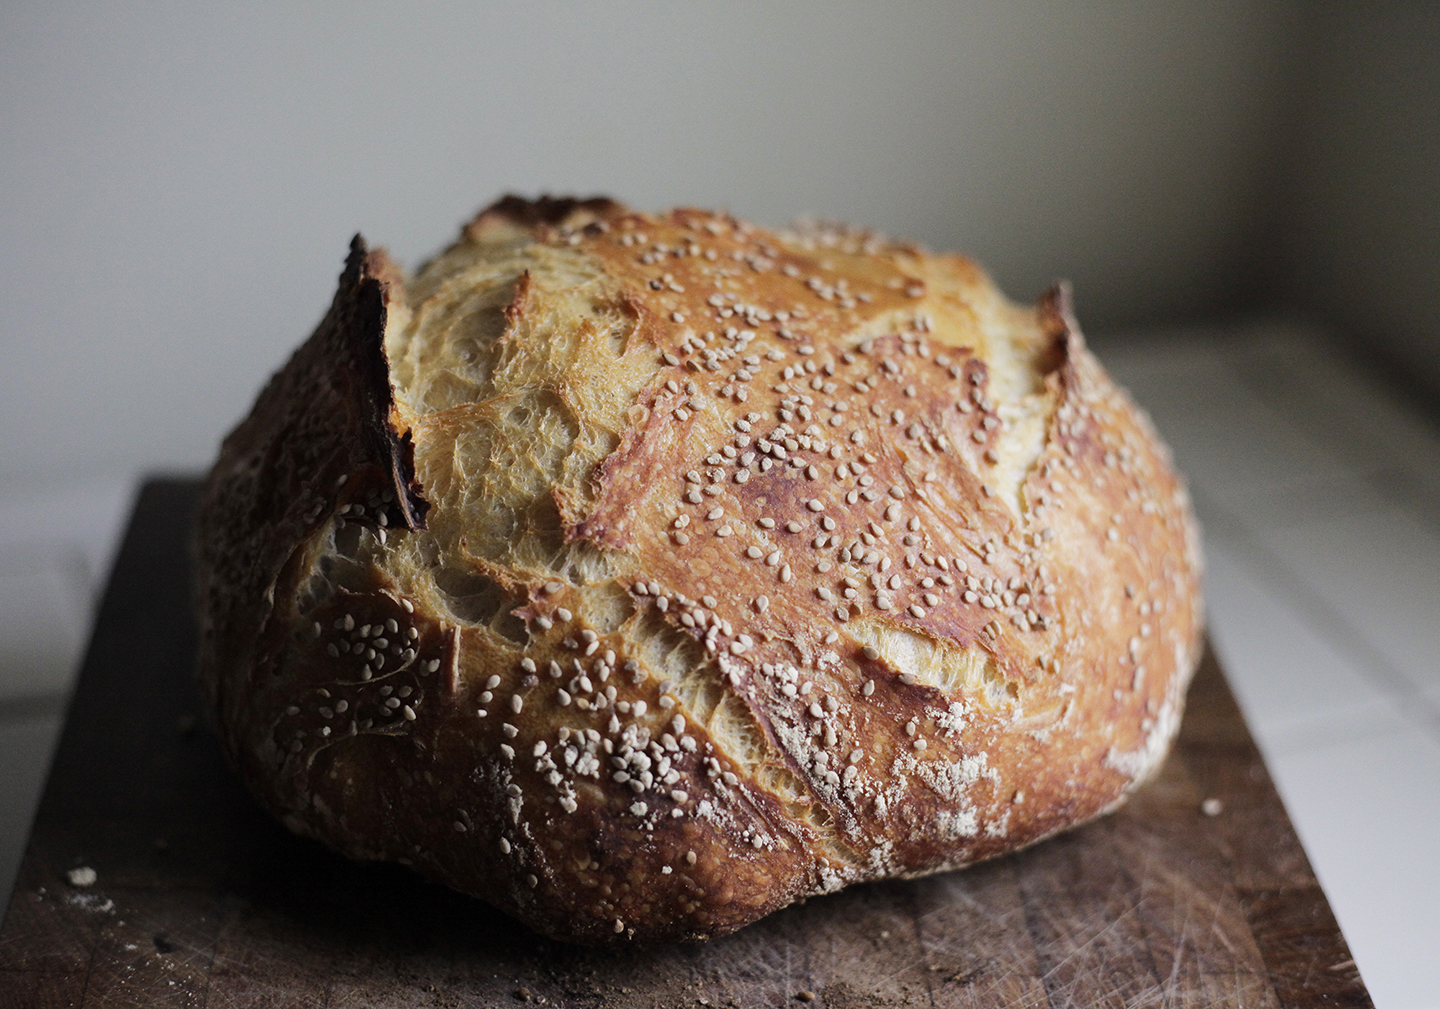
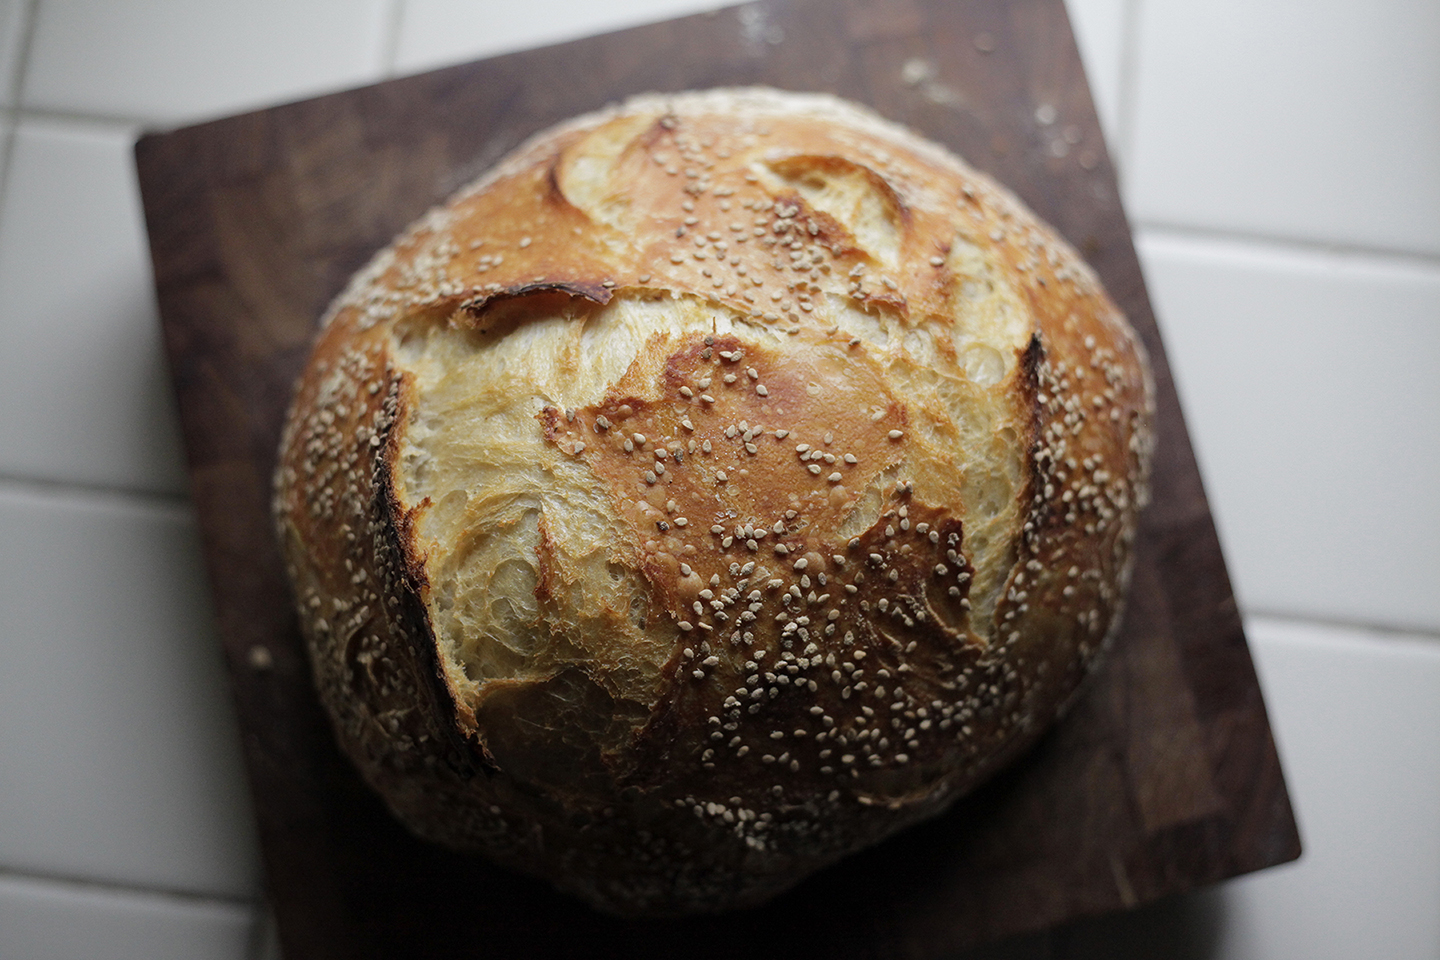
Baking sourdough in a cast iron dutch oven with parchment paper, my preferred method.
There are just 3 main steps to this no knead sourdough bread recipe-
1: Mixing the dough (first fermentation)
2: Shaping the dough some time 8 - 12 hours later (second fermentation)
3: Baking your loaf
Easy peasy! In total, active time is probably 20 / 25 minutes all together. You just have to get into a rhythm with its 8-hour+ fermentation schedule. What I like to do is mix the dough before I go to bed, then shape it when I wake, and bake it in the afternoon for fresh bread with dinner. If I can’t bake it that same day, no problem, I just put the dough in the fridge until I can.
If you already have sourdough starter, skip ahead to the main recipe.
Otherwise let’s start with how to make your sourdough starter from scratch. Starter is simply a reserve of yeast-infused batter comprised solely of flour and water. A starter can last a lifetime and be passed on for generations, all the while contained in the same unwashed vessel. Often immigrants would pass through Ellis Island with their starters in tow. That’s how precious they are, each carrying their own unique flavor.
HOW TO MAKE YOUR OWN SOURDOUGH STARTER
adapted from Sandor Katz's method
1. Vigorously stir together 2 cups each of flour and non-chlorinated water (fresh spring water is best) in a large glass or ceramic jar or bowl. (Glass is better so you can monitor how active the starter is later.) Feel free to add organic unwashed grapes, plums or berries to lend their chalky film of yeast (aka "bloom") to speed up the process.
2. Cover with a cheesecloth or dishtowel to allow airflow while guarding from fruit flies and critters.
3. Store your batter in a warm spot, ideally 70° - 80° F, with good air circulation e.g. your kitchen counter. Stir your batter at least once a day with a wooden spoon to distribute the yeast evenly.
4. Once you notice tiny bubbles surfacing on your batter or forming around the sides of the bowl (not ones caused by stirring), usually after 3 or 4 days, you’re ready to start the feeding process. (This is where the glass bowl comes in handy as you should see small holes on all sides around the bowl under the surface of the batter like the photo to the left) If this is not the case, try moving it to a warmer spot or adding a teeny bit of packaged yeast.
5. Strain out any fruit and add 1 - 2 tablespoons more flour to the batter every day for 3 days, always stirring vigorously. This will thicken your starter. You want it to have a pancake batter consistency, so add more flour or water as necessary.
6. Your starter is ready to use when it's nice and bubbly and active. If you’re an avid baker, you can leave your starter out on the counter so long as you feed it a tablespoon or 2 of flour twice a day. For the rest of us non-commitment types, store it in an airtight glass or ceramic jar in your refrigerator. This will dramatically slow the yeast's activity so it only requires feeding once a week / every other week. And if you're planning a trip, you can keep your starter unfed in the fridge for a few weeks, or in the freezer for longer. Just feed it generously before you go.
7. Make sure to always replenish your sourdough starter after each use! To do so, simply stir in flour and water equal to the amount you poured out. SO, let's say you used 1 cup starter to bake a loaf. You should then replenish your starter ‘batter’ with 1 cup flour and as much water as is needed to regain your ideal consistency. Stir well. If you like a strong sourdough flavor, you can leave your replenished starter out to ferment for 4 - 8 hours after each feeding before refrigerating. Otherwise, simply replenish and refrigerate immediately, which is what I do.
“If you neglect your sourdough, it may get very acidic, then eventually putrid. Up to a point, sourdoughs can be easily revived by feeding them fresh flour. Other organisms dominate after the yeast has consumed all its nutrients. But the yeasts remain present and can usually return to dominance when nourished.”
If you’re worried that your starter is in desperate need of reviving, pour off most of its contents and replenish with plenty of fresh flour and water. What remains of the original starter on the sides of the jar is usually enough to get it going again, but a little extra dollop couldn’t hurt.
. . . . . . . . . . . . . . . . . . . . . . . . . . . . . .
Wild Fermented Sourdough Bread Recipe

Once your wild-fermented sourdough starter is ready, it’s time to bake! Follow the below recipe for a fool-proof loaf, each and every time.
PRO TIP: You will need a dutch oven to bake this bread. I find raw cast iron to have the best heat transfer, but enamel or even an aluminum dutch oven will do alright. It is possible to bake this without a dutch oven, however it will not rise nearly as much. This is because the dutch oven captures the precious steam needed for that initial oven spring, which is where you get the most rise in the baking process.
INGREDIENTS
1/3 - 1/2 cup starter
11 oz. or more cool or luke warm water (not hot!!)
about 3 cups organic unbleached all purpose flour*
1.5 - 3 teaspoons sea salt (whatever your preference, I recommend all 3 tsp)
*I love King Arthur’s unbleached all purpose flour. Bread flour is of course wonderful to use, too! Sometimes I substitute 1/2 cup of the unbleached flour for 1/2 cup organic sprouted whole wheat flour. Wheat flour is dense, so you may need to add a touch more water to balance the hydration levels of your loaf.
DIRECTIONS
1. Pour starter into a large glass (preferred so you can see how active your dough is throughout the process) or ceramic mixing bowl. Do not use metal. Add water and stir until blended. Dump in all your flour, then your salt, and mix until well combined.
If you want a gold star, wait to mix in your salt until after you’ve mixed in your flour—after about 30 minutes, sprinkle the salt on top of your dough batter and with wet fingers pinch it into the dough. This can help further develop the gluten, but is an extra unnecessary step to be completely honest. Worth a shot if you want to go the extra mile and get a little more intimate with your loaf though!
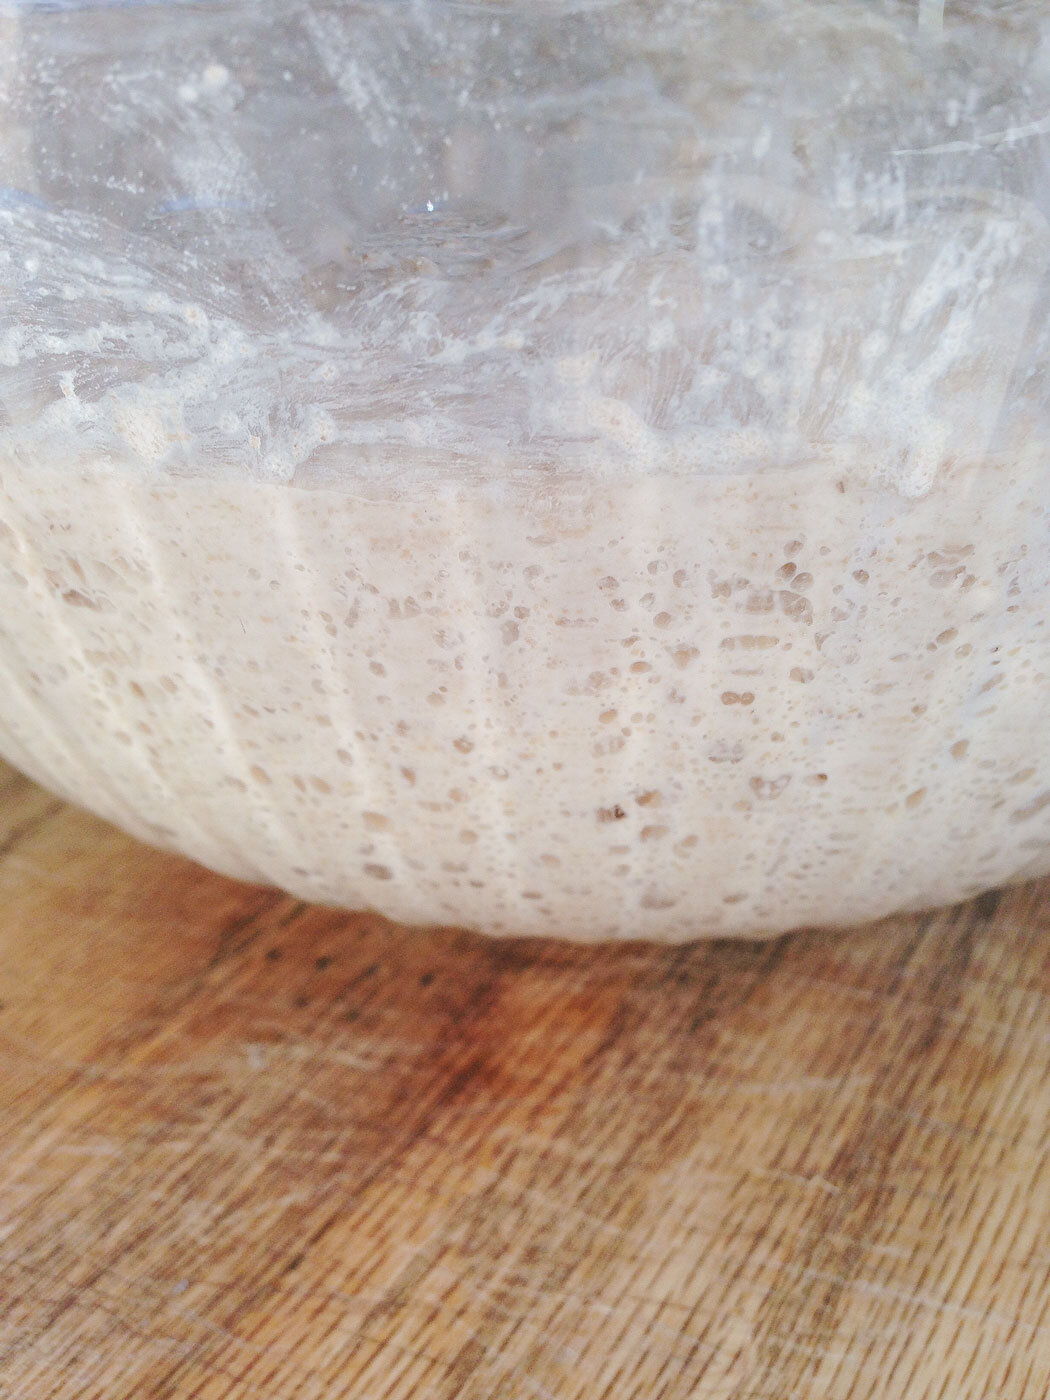
Add more water if needed. Final consistency should be thick and porridgey like this:


2. Let your batter sit in its bowl covered with a dish towel (so no flies get in) overnight or for at least 6 hours. This is the first ferment. Sometimes I let it sit for as long as 12 hours, but that is in cooler winter months. That helps develop the flavor more. I would not, however, suggest letting it sit out for that long during hot and humid summer months as your starter will be significantly more active and can get a lil funky if you leave it that long.
PRO TIP: Contrary to the many other recipes out there, you do *not* need to use plastic wrap for this step. Also if the air in your home is hot & dry, try dampening the dish towel to prevent a crust from forming along the top of the batter.
3. You know it’s time to shape your loaf when you see plenty of air bubbles along the bottom and sides of your batter. This is why I suggest using a glass bowl.
This is the point where you can add additional ingredients to flavor your loaf, such as roasted garlic, rosemary, olives, melted butter, or any other herb and spice combinations you can dream up. Just fold them in while shaping the dough. Keep in mind that these can weigh down your loaf, so it likely won’t rise as well as a traditional unflavored sourdough boule.
Pull your batter out of its container with a rubber spatula onto a well floured surface, then sprinkle some extra flour on top of the dough. Keep in mind that you want to make the dough firm enough to hold its shape here, but not too dry—it should have moisture when it bakes.
There is no need to knead this bread! Instead all you need to do is shape it. You’re going for a smooth ball shape. To achieve this shape, on the side of the dough furthest from you, stretch the dough out and away, then pull it up and back towards the center. It’s sort of like a scooping motion. Move around the dough clockwise, stretching and tucking each side over the next as you go. I usually do two complete rotations (or ‘turns’) twice in a row, but even just one ‘turn’ is all you need. This helps to further develop the elasticity of the gluten which lends itself to a better rise.
Flip it over after a couple ‘turns’. The best way I can think to describe it is that you want the shaped dough to feel like a cute lil baby butt.
This is important: you’re good to go when your dough can stand on its own without losing shape after 10 seconds or so. If it loses its shape and starts spilling around itself, it’s too wet. Add more flour.

4. Now that you’ve shaped your dough, you're ready for the second round of fermentation / rising. You have a few options here:

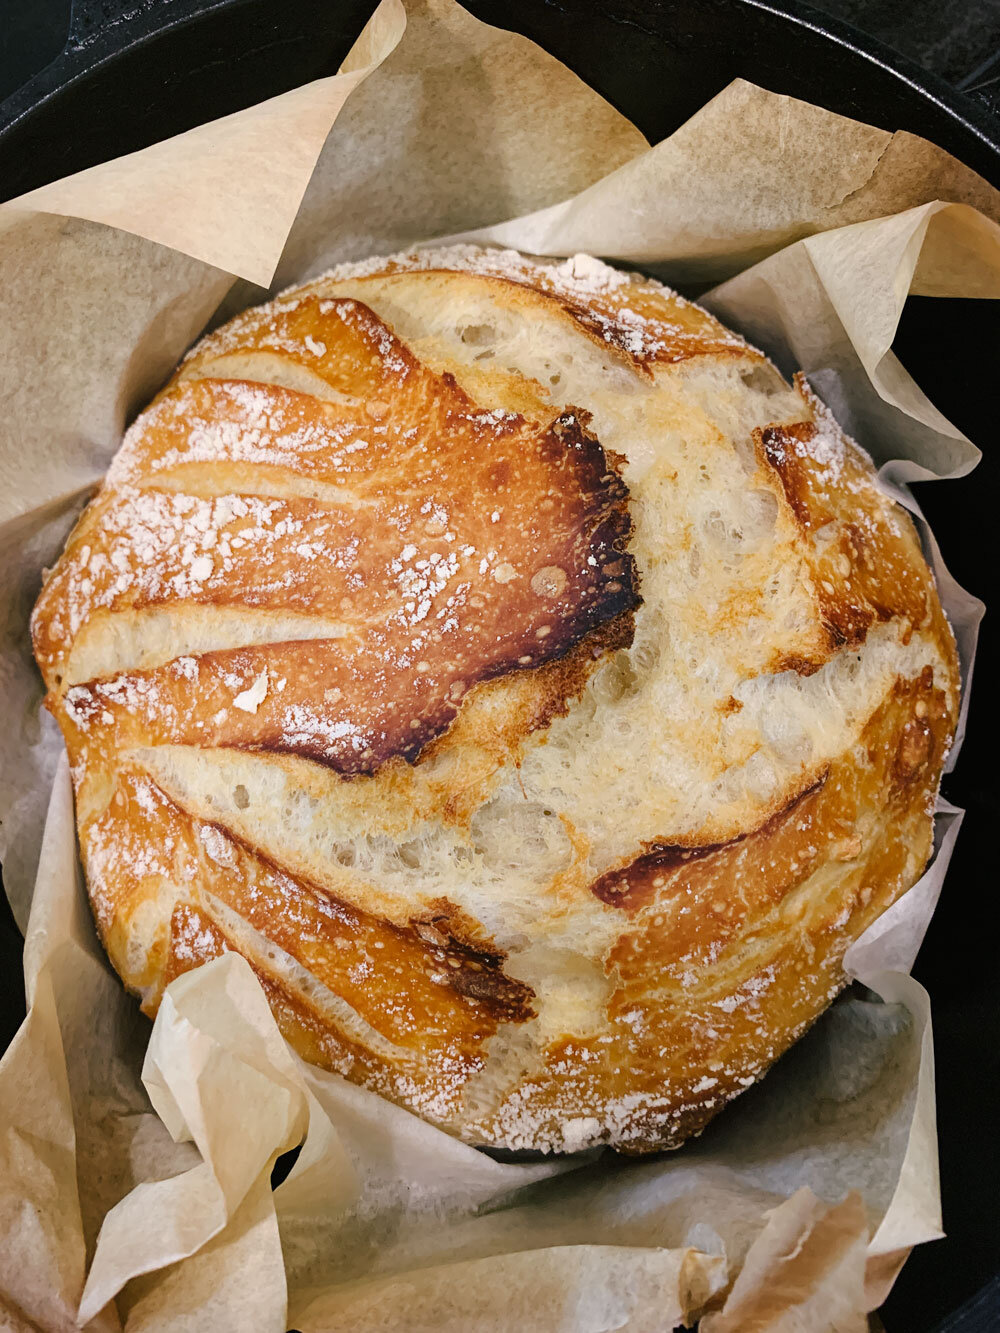
My preferred method is lining the bowl with parchment paper as this can later be quickly and safely transferred directly to the dutch oven. (See photo.) It really doesn’t get easier than this. I add remaining flour from the shaping process on top of the parchment paper, gently nestle in the shaped dough, then sprinkle more all-purpose flour around all edges of the dough, and finally top with a generous sprinkling of rice flour. The rice flour on top will lend itself to easier and prettier scoring later.
You can let your dough rise in a floured proofing basket. I find it’s best to use rice flour here. It’s very fine and silky, allowing you to easily flip the dough out of the basket when it comes time to bake. I also find this method allows for great scoring.
You can grease your glass or ceramic bowl with butter, olive or coconut oil, or your preferred fat and follow-up with a sprinkle of cornmeal.
You can generously flour the bottom of the bowl before plopping in your shaped loaf. With this method, I add extra flour all around the sides of the dough once it’s in the bowl to make sure it doesn’t stick as it rises.
You can line your bowl with a lightly floured dishtowel to let the dough rest on like so:

This is the moment when you can add seeds to the top—poppy, sesame, everything bagel blend, etc. for all the above bulleted methods except for the proofing basket method (since the loaf is upside down in the basket).
Once you’ve added any desired seeds etc., loosely cover your bowl with a dish towel and let it sit out on your counter for 4 - 8 hours if you're available to bake it immediately. Otherwise, put it in the fridge until you're ready, for up to 2 weeks but at least for 9 hours.
5. Let's bake! Your loaf should have risen at least 1/3 in size by the time you're ready to bake. You can let it double in size if you have the time. This will give you a better crumb and more complex flavor.
Turn on your oven as hot as it will go. Mine tops off at 500°. If you are not using parchment paper, lightly grease your dutch oven and preheat it for 30 minutes either with the lid on or off (but also in the oven to heat through).
6. Once the dutch oven is preheated, I like to gently smooth the rice flour around the top of the loaf, then score it while it’s still in the bowl. It’s OK if you don’t feel comfortable scoring yet—the loaf will crack on its own in the oven. However scoring does allow it to rise better.
Once you’ve scored your loaf, move the dutch oven to the stove top where you can carefully remove the lid. There may be smoke escaping which is totally fine, and in fact good IMO as it says your pan is nice and hot. Now transfer your loaf to the dutch oven, put the lid back on, and return it to the oven as quickly (and safely) as possible.
If you let your loaf rest on parchment paper earlier you can place that directly into the dutch oven. (This is definitely the easiest method and my personal preference).
Otherwise, generously sprinkle the pan with cornmeal or flour before gently and carefully guiding your loaf in to the hot dutch oven. (I recommend using a rubber spatula for this.)
Try to move quickly for this step. You want to put the lid back on and return it to the oven ASAP to trap all that precious heat to create the steam that will help your loaf rise. As I mentioned above, scoring also helps your bread rise here.
7. Bake for 15 minutes with the lid on as hot as your oven goes, then reduce the temp to 450° and bake for another 15 minutes.
8. Finally reduce heat to 350° and remove the lid. Bake for another 16-20 minutes (less time = a moister loaf). I find 18 minutes to be my sweet spot, but this all depends on your oven and your crumb preference. Just keep an eye on that crust! You’re going for a golden brown carmelized-looking crust.

9. As tempting as it may be to dig right in, let the bread rest for at least 15 minutes before cutting into it.
Your loaf should have a deliciously crusty crust and soft, fluffy interior filled with gorgeous holes aplenty. Use it for sandwiches, shmearing, sopping, and dipping, or eat it plain.

THE BEST WAY TO STORE YOUR SOURDOUGH BREAD
On the unlikely ocassion you don't eat the entire sourdough loaf in one sitting, the best way to store it over the course of a few days is cut side down right on your cutting board or counter. Sure your cat might lick it, but this keeps that crusty crust crusty. You can also put it in a paper or plastic bag without closing it all the way. Another option is to keep it in your dutch oven, a closed plastic container, or even just tied up in a dishtowel, but I find this makes the crust a bit rubbery. There's no need to refrigerate your loaf.