The Gmail Settings & Plug-Ins That Streamline my Workflow

When more than 1 in 7 people the world over use Gmail, chances are you do too.
One of the many reasons Gmail is such a beloved email platform is that it’s constantly updated to improve the user experience and integrate with the latest programs many of us use every day (e.g. Dropbox, Asana, Intuit Quickbooks, Trello, etc.). And of course, it’s free.
There’s so much you can do with a free Gmail account, and to help you start streamlining your email process I’m sharing with you my 5 favorite settings and plug-ins I use every. single. day. These tools help me improve my productivity, stay organized, save loads of time, and avoid email regret.
. . . . . . . . . . . . . . . . . . . . . . . . . . . . . .
THE GMAIL SETTINGS & PLUG-INS YOU SHOULD KNOW
1. CANNED RESPONSES
If you find yourself answering the same question over and over, copying and pasting email responses from previous threads, or forwarding old emails, this is the heaven-sent Gmail tool for you! Canned responses allow you to easily create email scripts that you can save, update, and insert into an email thread with just a couple clicks.
To start using this feature, first go to Settings > Advanced > Enable Canned Responses (Templates).
Then follow these steps:
Compose a new email, write out your script, and in the bottom right of the compose window click the three dots
Then hover over “Canned responses“ in the window that opens
Then click “New canned response” like so:
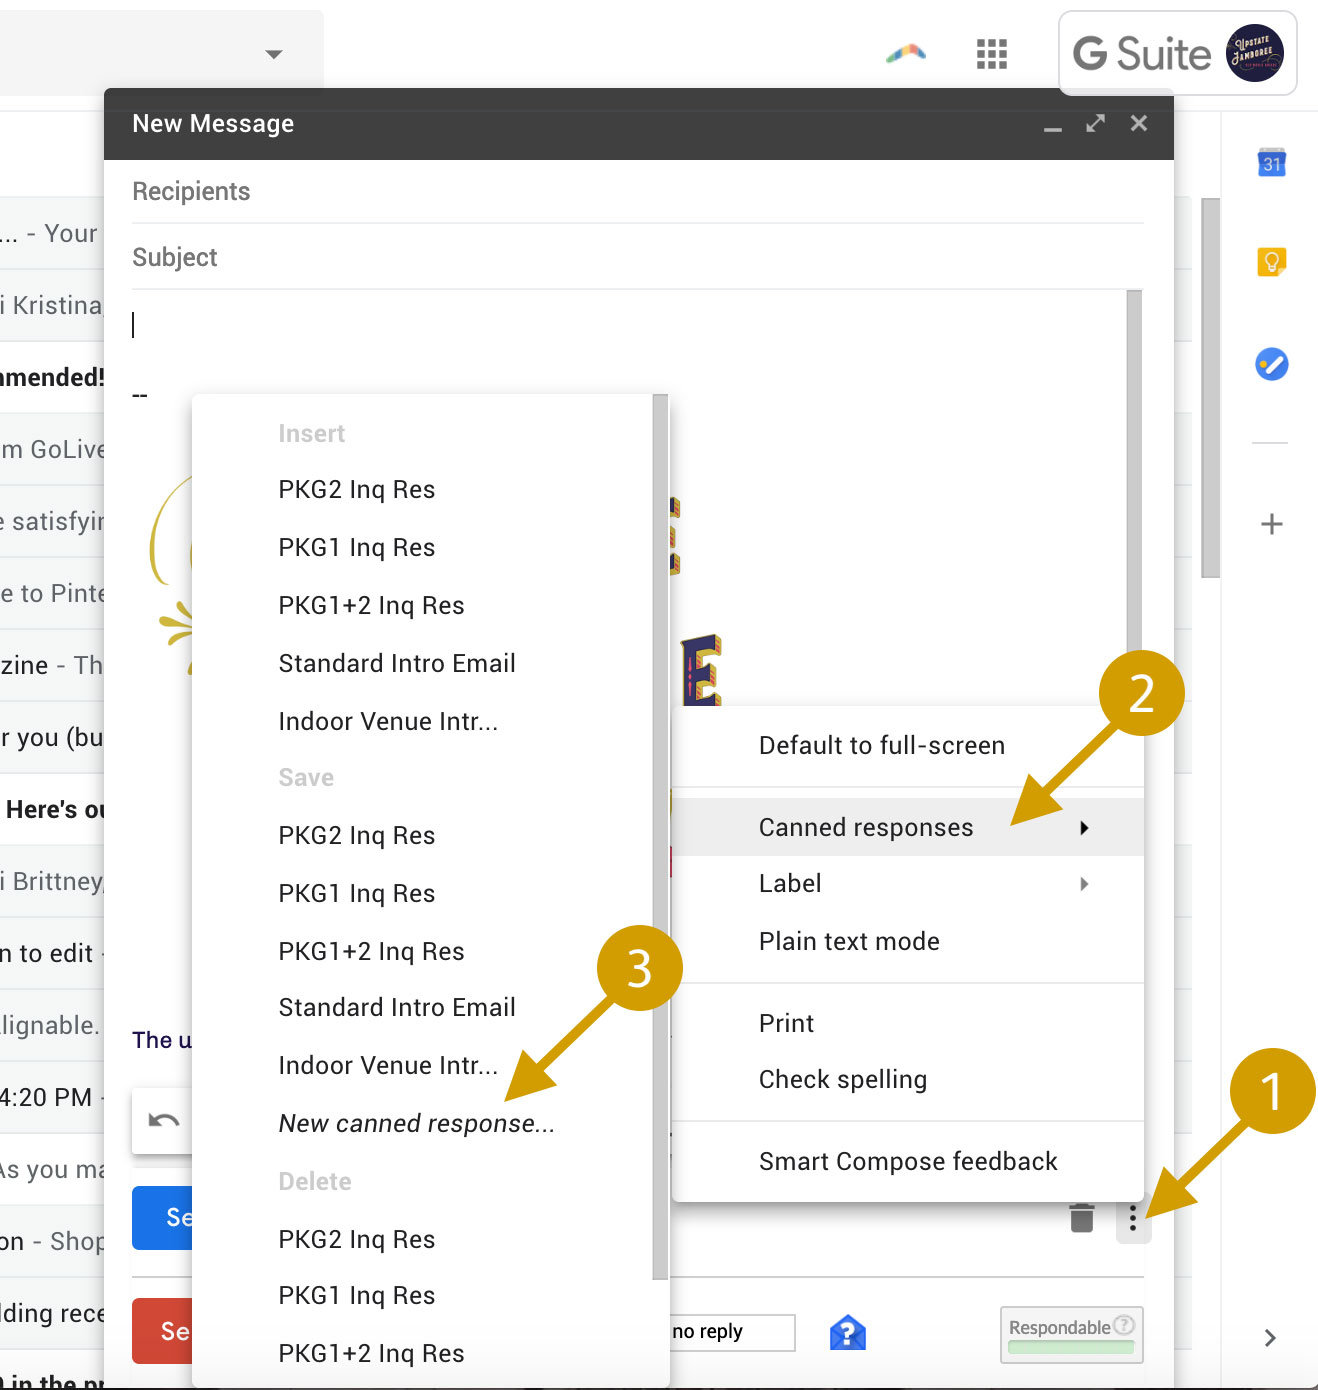
You will be prompted to title your new email script so you can easily use it for future emails by selecting it from the “Insert” section at the top of that third window.
You can see in the screenshot above that I use 5 different canned response email templates for my business Upstate Jamboree. Since these emails are each very long, this saves me loads of time when replying to game rental inquiries or reaching out to new venues and wedding planners.
2. UNDO SEND
Once upon a time this feature was a Gmail Lab, but now in the latest iteration of the email platform it is included as a standard setting. And thank goodness for that! Have you ever sent an email only to cringe 2 seconds later, realizing you forgot to include an attachment, or completely breezed past an essential question, or mistakenly sent it to the wrong email address, or saw a glaring, embarrassing typo, or…. need a list more reasons? We’ve all done this more times than we’d like to admit. Well fret no more! This Gmail setting will save you from some serious email regret.
To enable it go to Settings > General (first tab) > Undo Send and select the number of seconds you would like to allot yourself for the email cancellation period. (I highly recommend the maximum amount of time which is 30 seconds.)
Once enabled, you will then have up to 30 seconds to cancel an email that you just sent. You’ll see a little notification window pop up in the lower right hand corner like so:
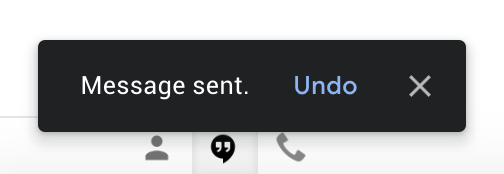
Just a heads up that the Undo Send window shown above will disappear before those 30 seconds are up if you navigate to a new screen or tab in Gmail, or open a new email.
3. BOOMERANG
Have you ever wished you could schedule messages to be sent later, track email responses, or set up email reminders? Of course you have! Well, my friend, Boomerang is for you.
With Boomerang, you can write an email now and schedule it to be sent automatically at the time of your choosing. The email will appear in your “Boomerang-Outbox” folder in the left side of your Gmail account (a few spots below your “Inbox” folder) up until its scheduled send time. You can edit the draft’s message, recipients or send time, or even cancel it altogether.
There are so many reasons why email scheduling comes in handy. Let’s look at a few scenarios-
WORK ON YOUR OWN SCHEDULE
You’ve written an email on a Saturday night but don’t want it to get lost in your coworker’s inbox, so you schedule it to be sent Monday morning. Smart timing for the win!NEVER FORGET TO SEND ANOTHER EMAIL
You have an important email ready to send to your marketing team, but know they are in an all-day meeting and don’t want to distract them, so you hesitate thinking I’ll just send it tomorrow when they’re back at their desks and more focused. Yeah, OK. The task list forever runneth over, so do yourself a favor and schedule that email so there’s one less thing to worry about this week.MAINTAIN NORMAL WORK HOURS
You’re sending an email on a Sunday (shhhhh) but don’t want your client to assume you work on weekends, so you schedule it to be sent Monday morning.SEND EMAILS WHEN THEY’RE MOST LIKELY TO BE READ
You’ve drafted a newsletter on a Monday morning, but know that your customer base opens most email marketing from Tuesday - Thursday between 8pm and midnight, so you schedule it to be sent somewhere in that window.
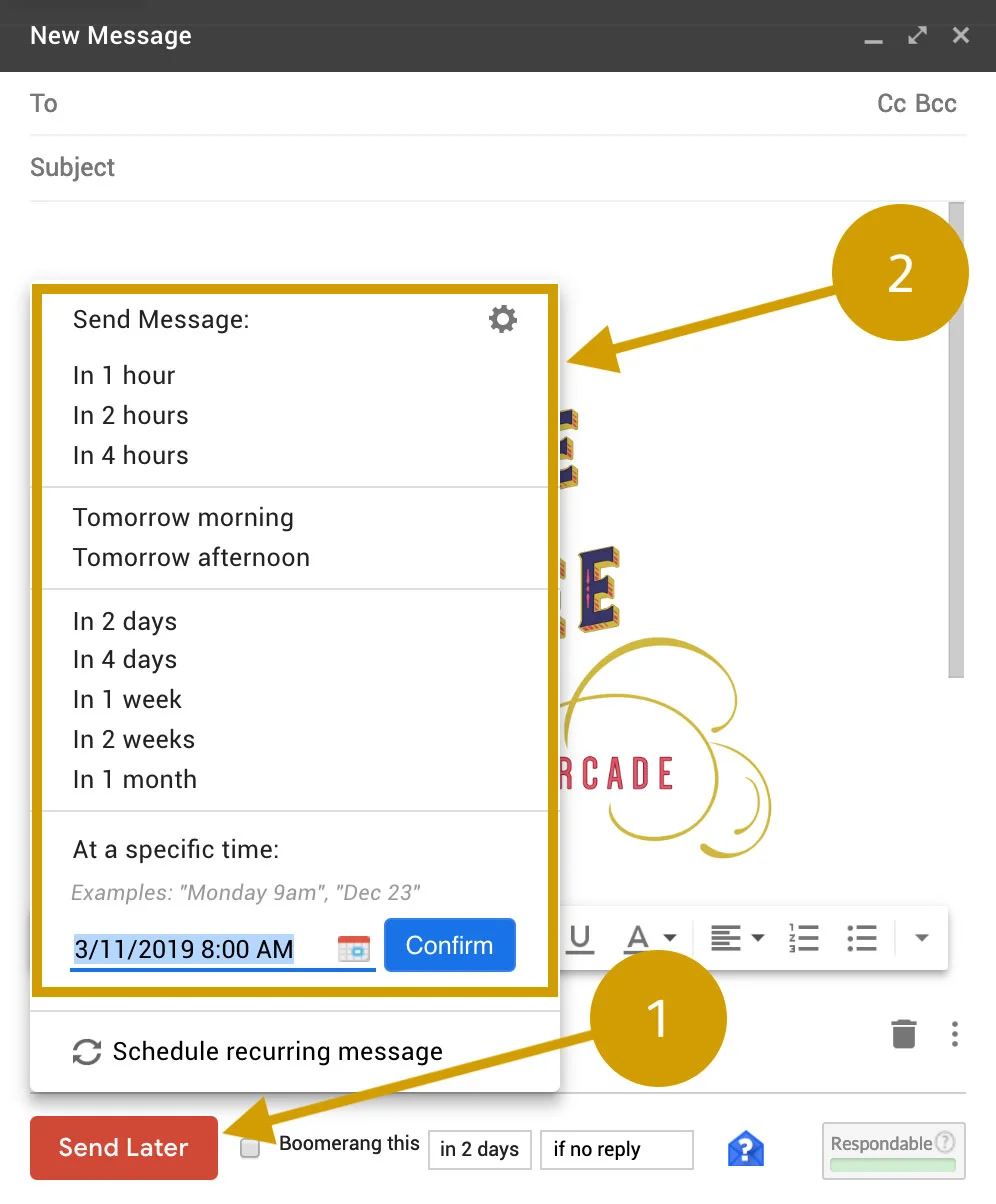
Once installed, 1. just write your email as you normally would, then click the red Send Later button in the bottom left corner of the email compose window and 2. select the date and time you would like to schedule your email to be sent, like so.
Another great feature of Boomerang is that you can use it to remove emails from your inbox until you need them or will be better equipped to respond. To schedule a reminder email, simply open the message, click the Boomerang button along the top tool bar, and choose when you’d like it to be added back to your inbox. It will be temporarily stored in your “Boomerang” folder until the specified date and time, so you can still access is sooner if need be. When it comes back into your inbox, it will at the top as an unread message as if it was just sent to you.
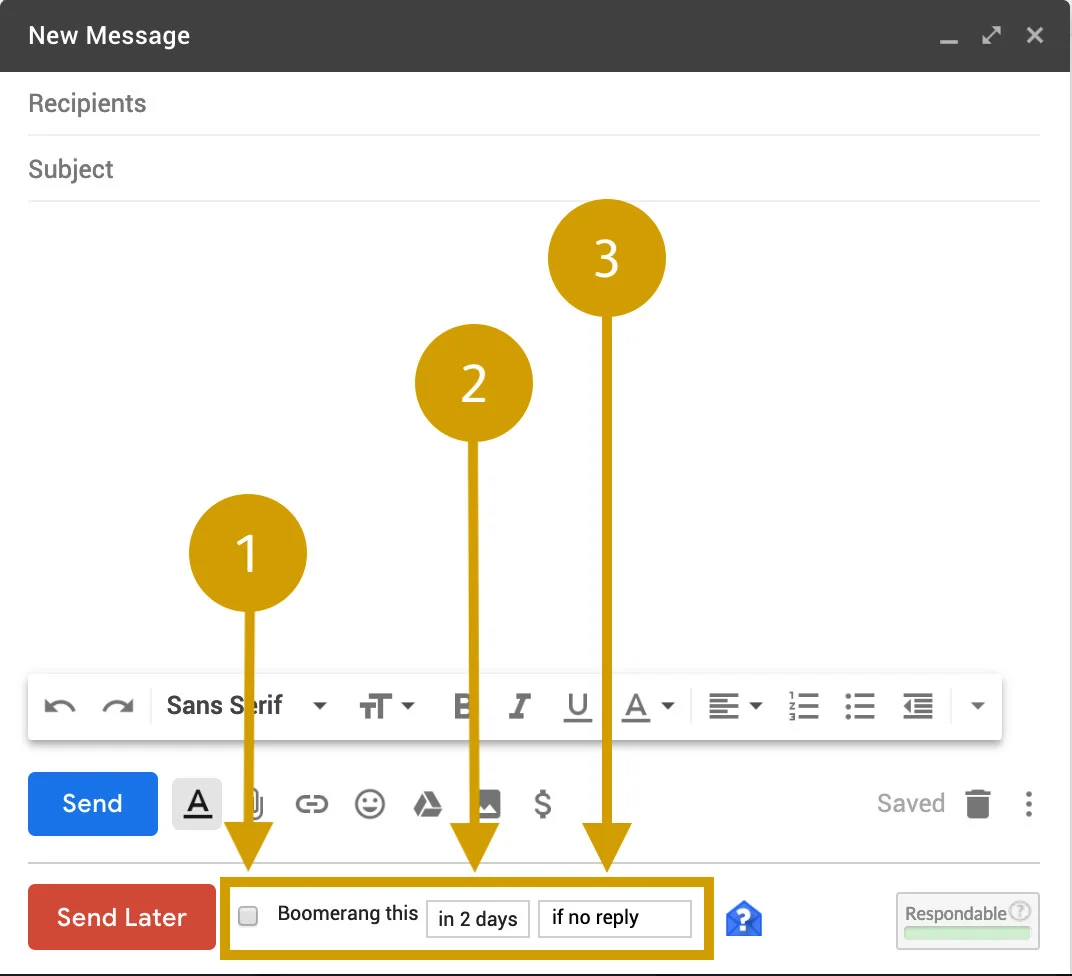
Additionally you can use Boomerang to track email responses, so you will get a reminder about an email if the recipient:
doesn’t respond within a specified amount of time
doesn’t click anything in the email
doesn’t open the email
regardless of any actions they take on the email
Just set your parameters when composing your email like so:
Here are some instructional videos to show you the best ways to use Boomerang for Gmail:
HOW TO SCHEDULE EMAILS TO BE SENT LATER
with Boomerang for Gmail
HOW TO TRACK EMAIL RESPONSES
with Boomerang for Gmail
HOW TO SCHEDULE EMAIL REMINDERS
with Boomerang for Gmail
HOW TO MANAGE YOUR SCHEDULED EMAILS
with Boomerang for Gmail
4. INBOX ORGANIZATION
Gmail affords numerous ways to organize your inbox, knowing that chronological order isn’t always best. Maybe you’d like to see your unread messages or priority emails first, or want to toggle between the various options to find that one email you know you received Friday night but completely forgot to respond to come Monday and are panicking to find it come Thursday.
To browse the different inbox organization options available:
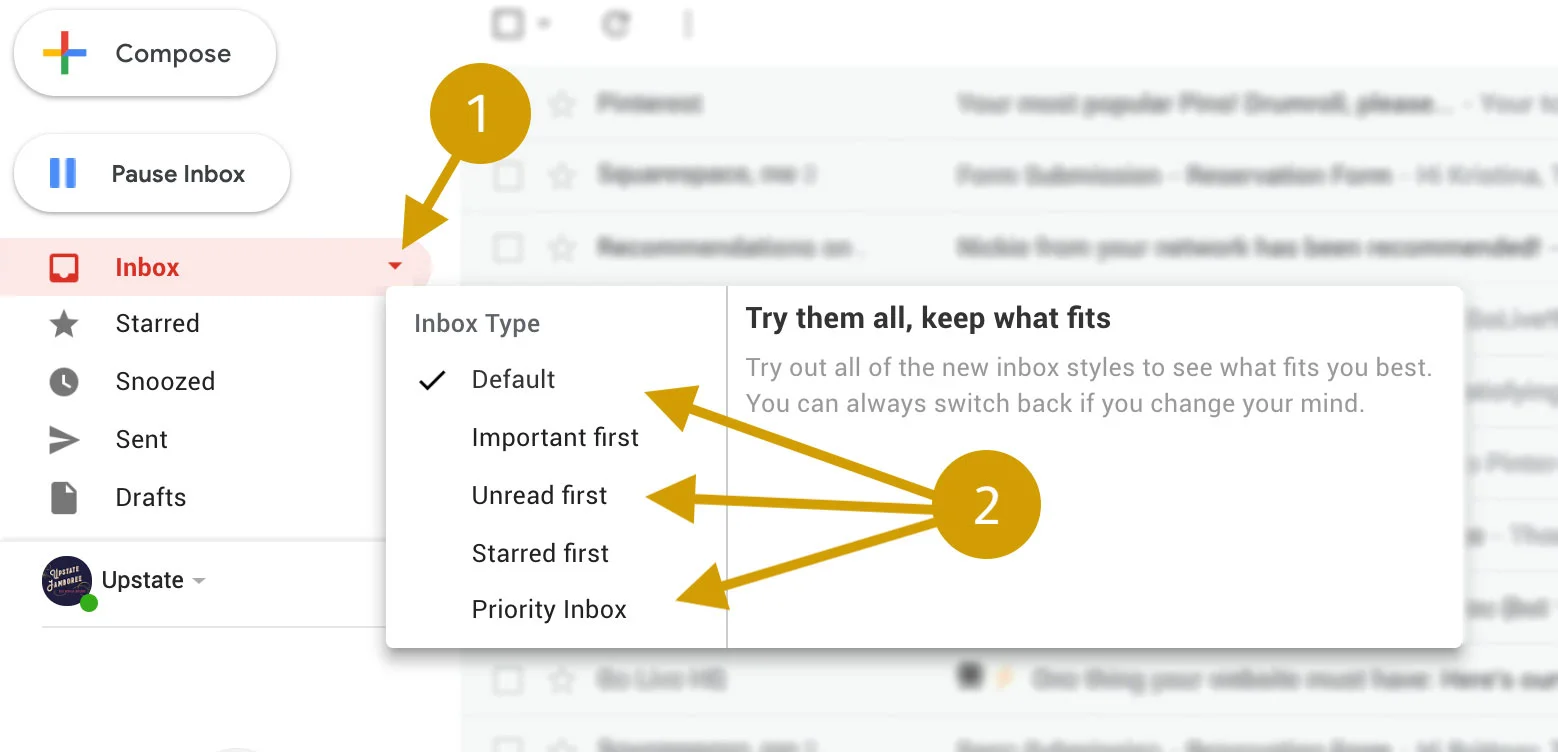
Hover your mouse on the “Inbox” tab on the left side of the screen until a little downward facing arrow appears.
Click that arrow and a window will open showing you the various inbox types. Hover over them to see their descriptions appear on the right.
5. DROPBOX EXTENSION FOR GMAIL
This Chrome extension allows you to integrate Dropbox directly into Gmail so that you never have to leave your email window to attach files directly from your Dropbox account. No more downloading files to your computer then uploading to your email, or logging in to Dropbox to manually create a shared link. This add-on does it all for you! And if the files are too large to attach to the email, it will automatically include a link for you.
The Dropbox Chrome extension even allows you to upload files to your Dropbox account within the Gmail window.
First, you need to have a Dropbox account. If you don’t already have one or are interested in starting fresh, here’s my referral link for creating a free Dropbox account. Once you sign up and install Dropbox on your computer using that link, you will get 500 MB of free bonus space!
Once you have a Dropbox account, it’s time to install the extension. Go to the Chrome Web Store from your Chrome browser. Search “Dropbox for Gmail” and click the blue “Add to Chrome” button on the right side of the screen. As it installs itself, it will automatically open your Gmail account and prompt you through a mini tutorial introducing you to the plug-in.
To use this feature:
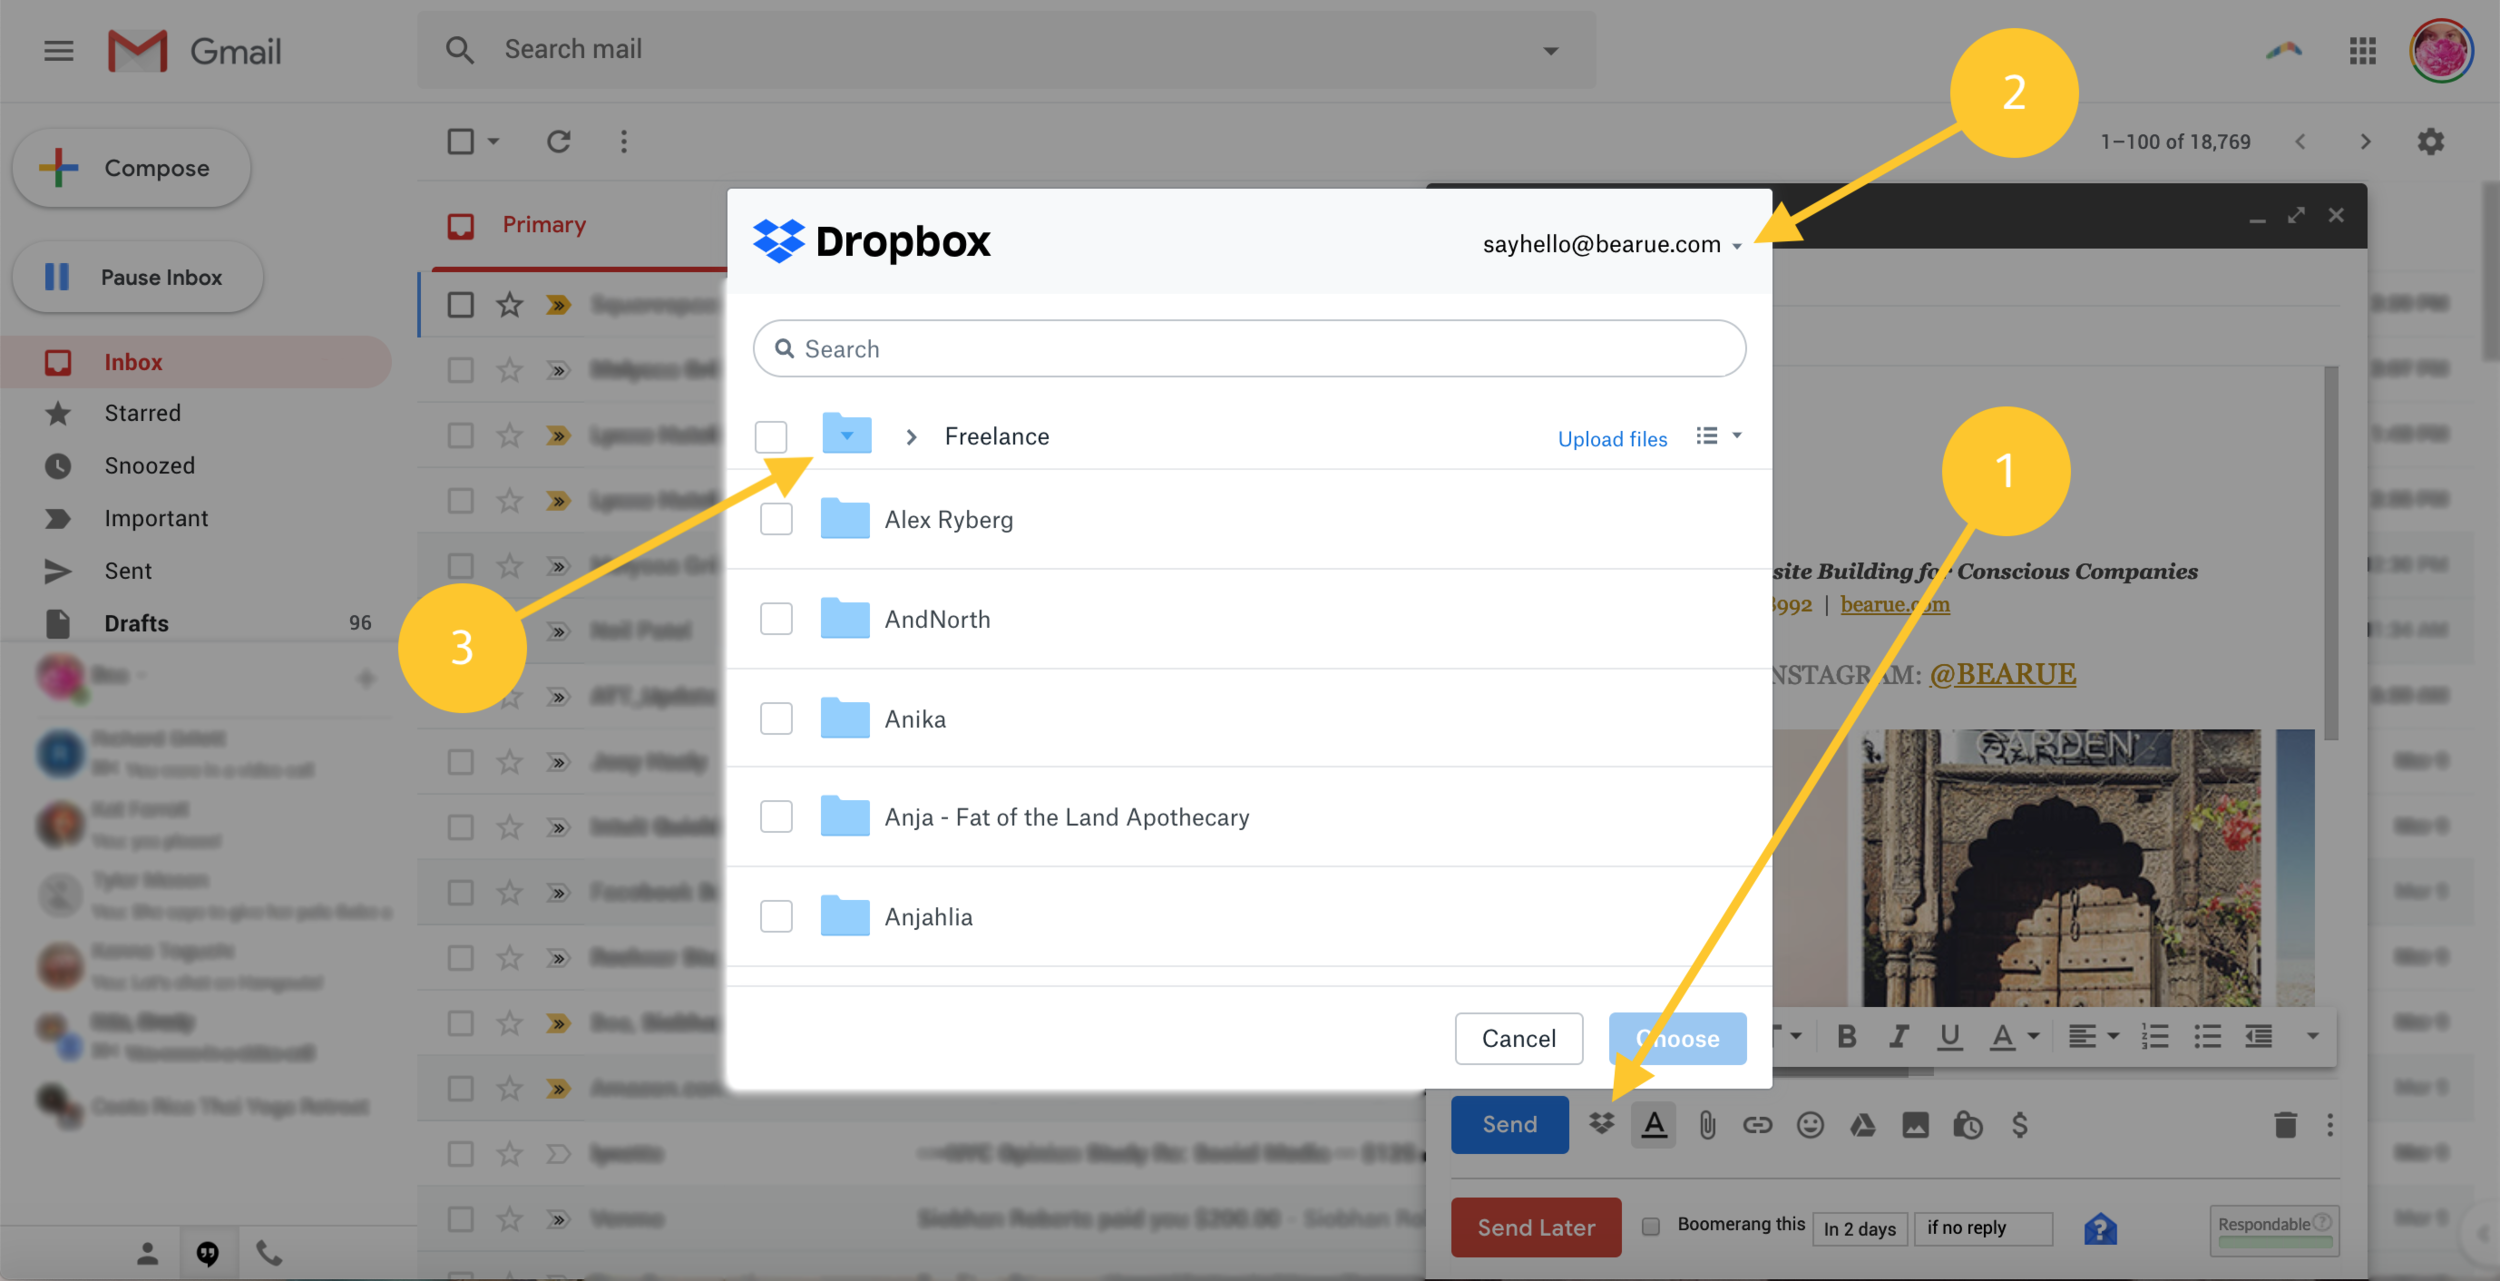
Click on the little Dropbox icon at the bottom of an email you’re composing.
A Dropbox window will open. If you have multiple Dropbox accounts like most of us, first make sure the correct account / email is selected in the top right of the Dropbox window.
Then simply select the folder or files you would like to include in your email.
Ta daaaaaa! Here’s an annotated screenshot I made to walk you through the steps above:
6. BLOCK ANNOYING OR AGGRESSIVE SENDERS
I’ve been blessed to never need the block feature in Gmail, but it’s certainly good to know about!
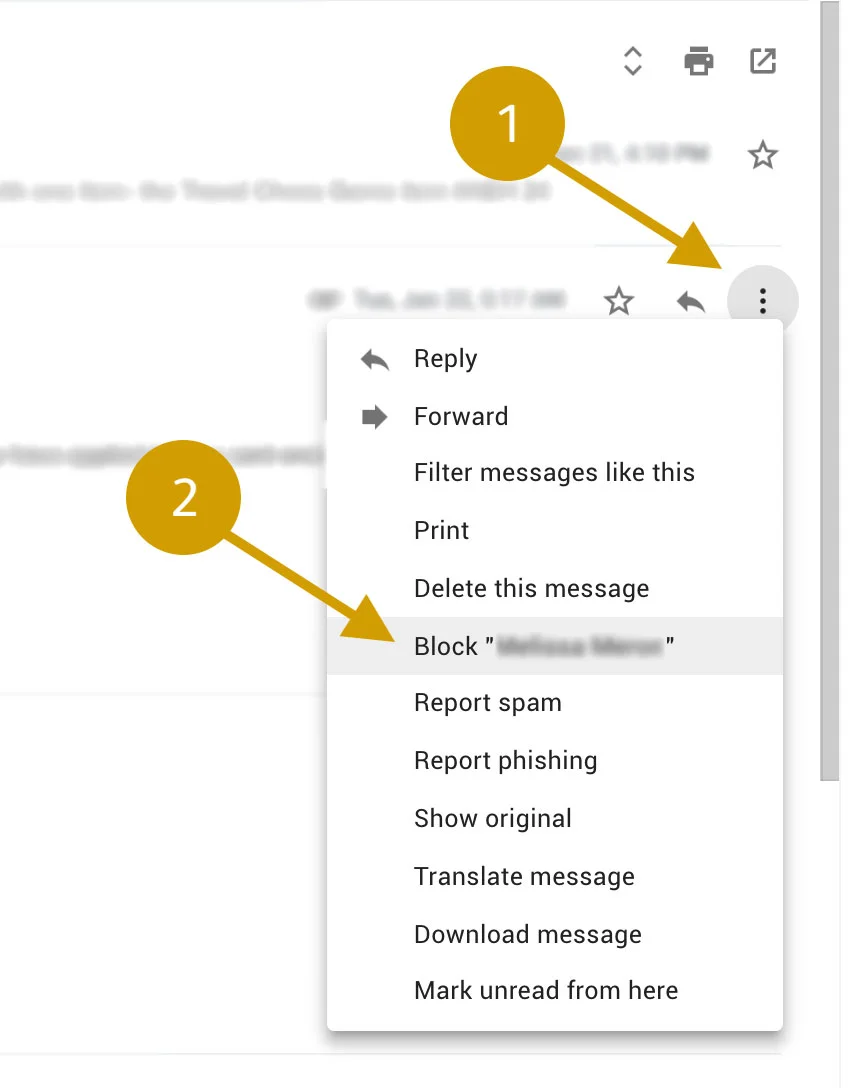
If you ever find someone flooding your inbox with unwarranted messages or becoming aggressive in tone, you can block them from your inbox.
Just 1. click the three dots in the top right of any email from that sender and 2. select the “Block” option in the pop-up window, like so: